We've had generative AI images and video for what feels like forever now, so nothing I'm doing is crazy new, but I have been trying some things and experimenting with some oldies, but running in a new context: on my actual local machine.
Gen AI images seem to keep getting better and better, and gen AI video seems to be hitting it's stride as something that's actually usable now. That's not to say spaghetti eating Will Smith did not have a time and place, but results from recent models speak for themselves.
What's a bit new is that folks seem to be pushing back against AI in a big way. If you hop onto your local community forums (wherever that may be), you'll see lots of folks with pitchforks out for the new data centers being built. The theory is that we need lots and lots of compute power to generate the AI meme slop we know and love, and for that, we need data centers built in your neighborhood. And they consume lots of water, power, and peace and quiet.
 The data center being built in your neighborhood
I'll admit, I need to do more research on data centers to have a real opinion. However, I really don't like generative AI in the cloud for another reason...tokens.
AI in general is notoriously known for not getting it right the first time...or the second. Plus it costs cash money. Not only that, but it's token based. Personally I get angry thinking about airline miles and how they don't make sense or translate to anything real, so I certainly don't want the equivalent for making neat art.
But seriously - charging for experimenting with a new technology really just kneecaps me wanting to keep trying. For this post, I'd been running video queues most weeknights and just seeing what happens. If it crashes or makes bad output, who cares. I tried and didn't spend cash.
Anyway, the hardware I'm using is not for the faint of heart. I've got a brand new Macbook M5 MAX with an insane 128GB of RAM. But also, on a Mac, this memory is shared with the GPU, so as Michael Keaton's Batman says...."Let's get nuts".

Locally Sourced, Organically Grown Video #
Like I said, I've been playing with a few workflows, but the one that worked first is upscaling video. Compared to others, the model here is incredibly tame weighing in at just under 70MB. Compare this to 10-50GB generative image or video models I ALSO have downloaded to my heavy hard drive.
I'm using a model called Real-ESRGAN. This particular flavor is one that scales up 4 times. And actually now that I link to it, it looks like the model runs on a web page for their demo. Dang, that's cool. Something to look at later.
But for now, I'm actually doing this for video, which is way more intense and has it's challenges. I don't mean to imply that its equivalent to brain surgery or anything over doing just images - its just intense because you're cramming 30-60 frames per second into your GPU compute shader, and things end up going badly if you don't find a way to make your GPU happy.
In the end, I've narrowed down to something that works and produces 4k(ish) videos locally. Each 150 frames or so takes around 4 minutes to process I've seen. By the way, I say 4k(ish) because of my source media. I'll get to that in a second.
To Comfy or not to Comfy #
How I got here is that I really wanted to try ComfyUI again. I had it running a few years ago on my Windows PC with my brand new 12GB Nvidia GPU. It could do some neat generative images at the time but just not enough memory for video, so I gave up.
But now it's 2026 and ComfyUI has a desktop app. WHAT? Insane. Its come a long way.
For those that don't know, Comfy offers a Node based interface. You connect the noodle looking stringy bits together to connect nodes that do different things.
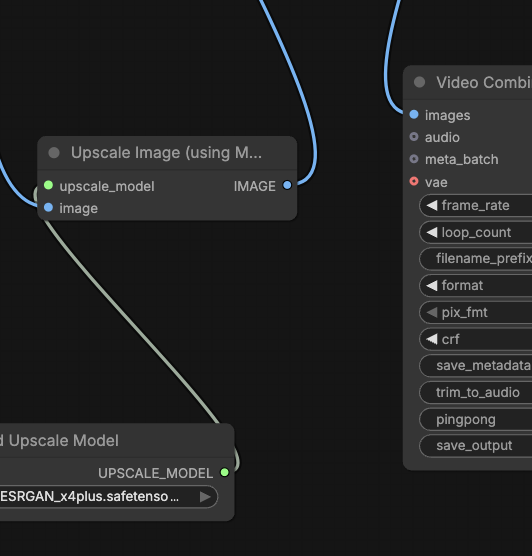
For those that say "Hey, that sounds way easier than actually programming", I kind of have bad news for you. It gets super confusing and weird real fast.
Personally, I thought it would be cool. Maybe I have something to load an image, pipe it through to the upscaler, and then pipe that to a save file node.
Nope. That's the dream, but once you get into a workflow things start breaking, and you need to fix them. And that's when you start adding super normal nodes that don't involve AI, but don't really work together, and you don't know why.
My Worfklow #
My upscaling graph isn't terrible, but it took a long time to get here.
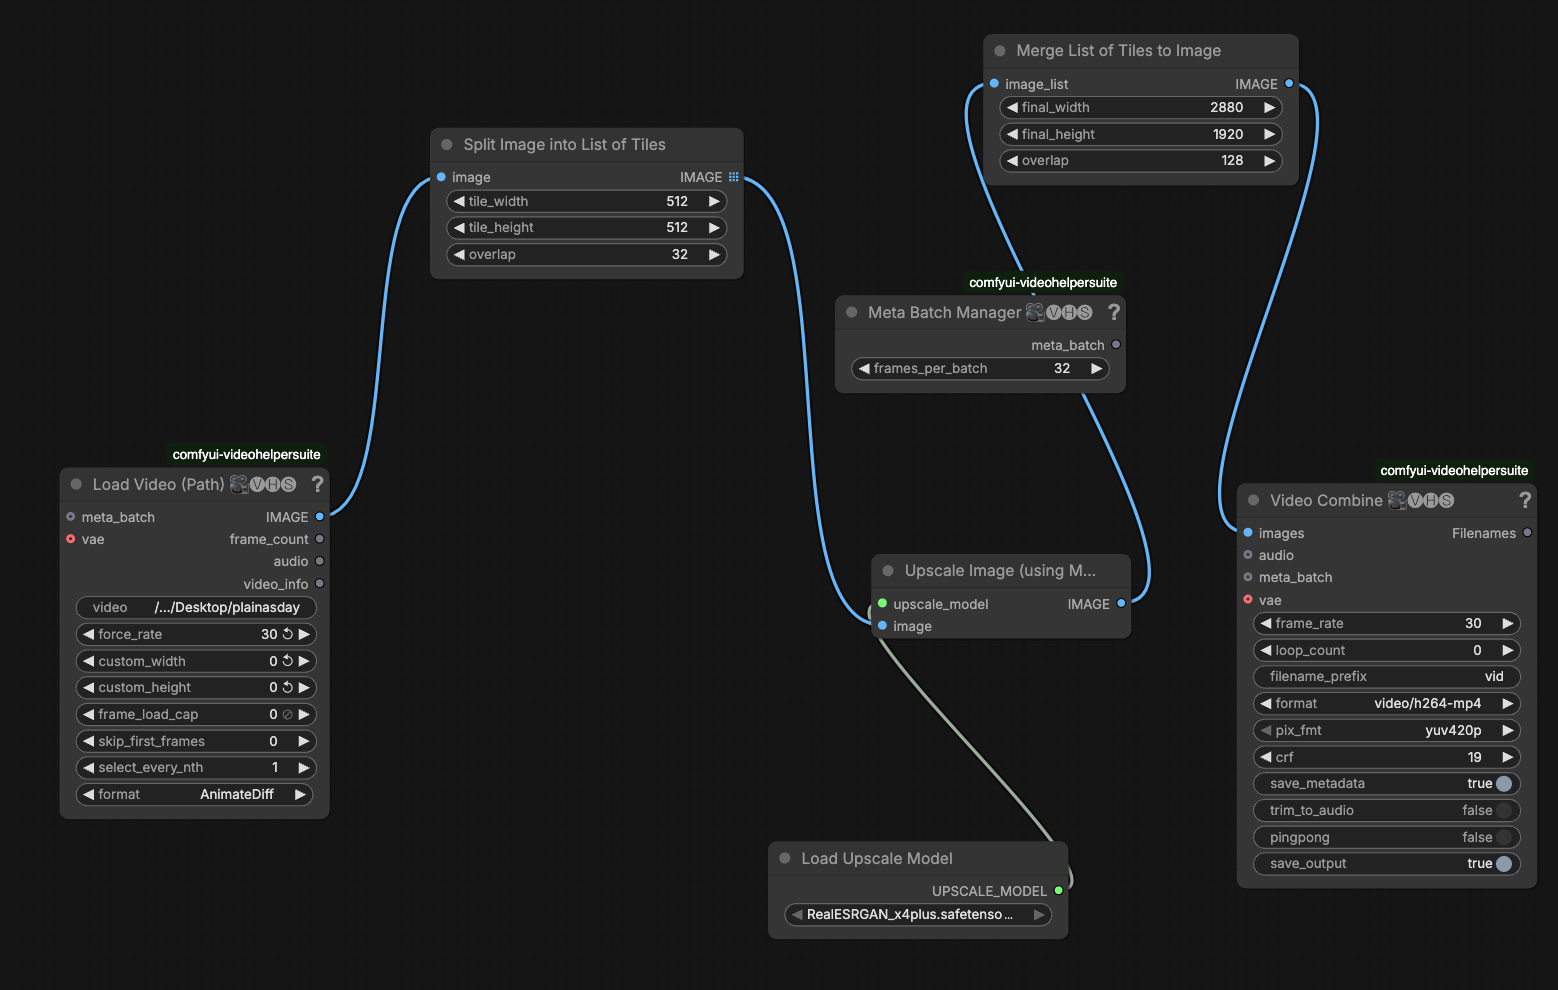
First, I start with a "Load Video (Path)" node. Here we can provide a video path, and the one setting I chose not to use for the default was the frame rate. It defaults to 60fps, so I set it to 30fps.
Ideally, next would be the "Upscaler" node, but not so fast. Keeping things simple like this had....so many problems. First of all, loading a three and a half minute video into this node would just be too much and it would complain right away.
So, I used FFMPEG to keep splitting into smaller and smaller chunks. I actually don't know the best threshold here because the loader would start being OK, but there were other issues, so I eventually just settled on 5 second chunks to move on to the rest of the workflow.
With just one 5 second chunk to test, I'd leave Comfy running when I went to bed. After 2 or 3 hours or so, it would crash with no great error message. I can't say if memory usage was exactly the problem, but I moved into a frame batching solution with a "Batch Manager" node.
The batch manager would only do a certain number of frames at a time. Which, in retrospect, means I was trying to make the opposite happen before this? Load all frames at once and try to keep them in memory the whole time while upscaling?
Doesn't sound great. But again - Comfy just lets you wire this up like there's no problem!
Not only did batching work for low resolution videos, but it kept updating the PNG image that sits beside the video output while it did it's job. So, no waiting overnight to see if it worked for my video. Hint...it didn't.
So for something like 320x240 sample videos it was fine. But my source was a little over double that. I ended up with massive horizontal line separation. It looked rad, but it definitely wasn't good output. Initially I thought it was an interlacing problem (something we had to deal with in the 90's and early 2000s), but it wasn't.
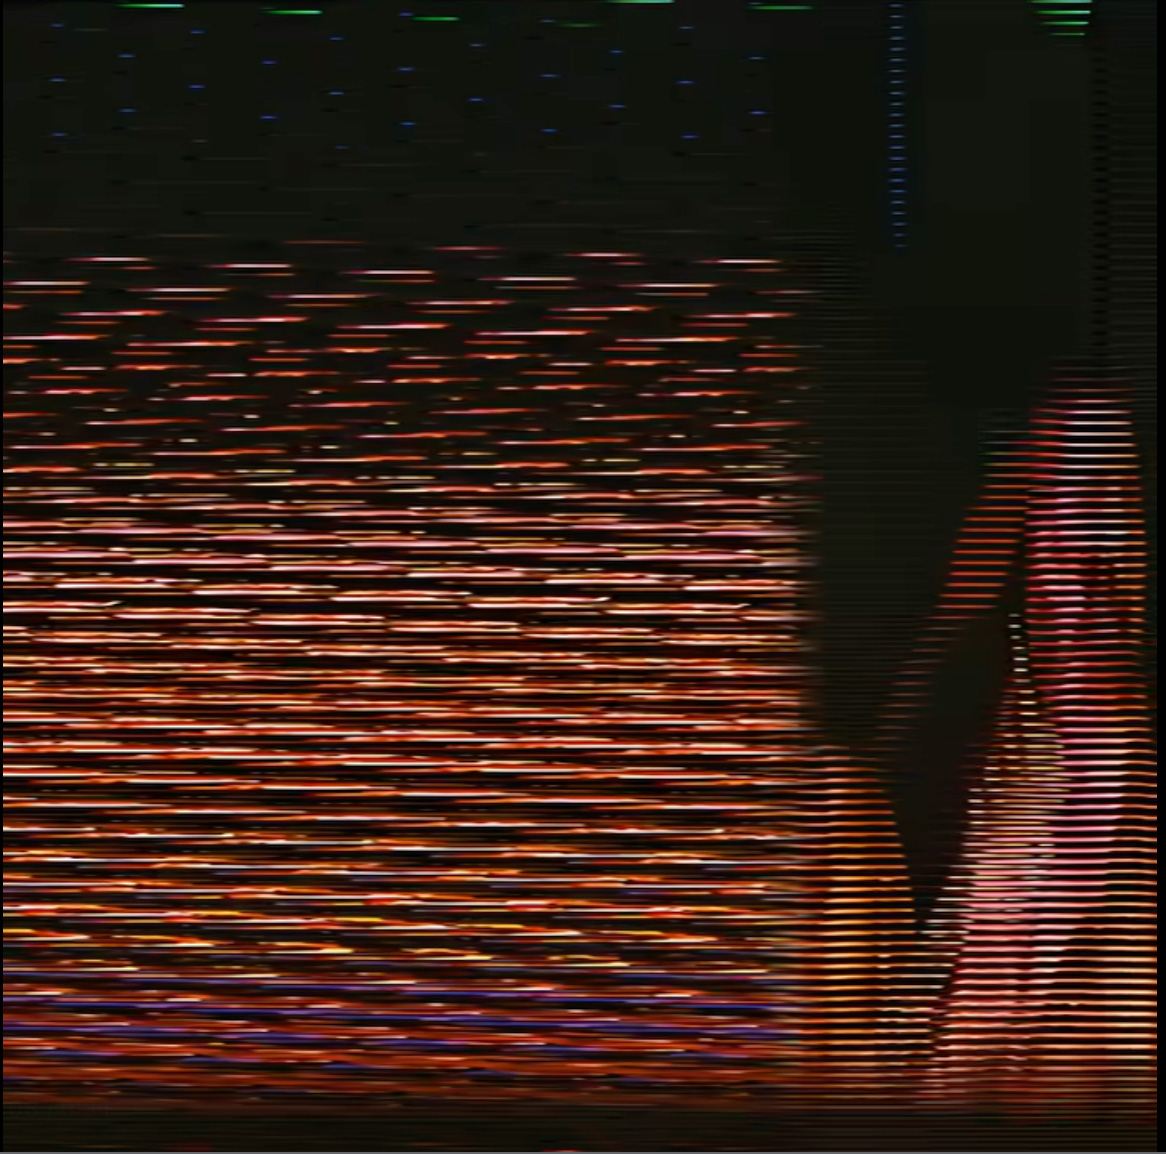
It turned out to be something called pixel shearing, channel shearing, or scanline offset. Basically there's some kind of bug on Mac OS specifically in PyTorch. So obviously, I'm not running on an NVIDIA GPU. My install of ComfyUI, instead targets Apple's Metal or Metal Performance Shaders (MPS) backend.
What happens, I guess, is that the allotted GPU memory gets filled up with the image, but runs out of room for larger images, and then it wraps around and starts writing to the wrong red, green, or blue pixel channel. So all the pixels start becoming offset, and you get an (admittedly rad looking) horizontal line effect.
This is on the final output - so the batch manager doesn't help.
The only thing that will work is reducing the size of the upscaled output. And this is where we start tiling things. So, I add two more nodes to comfy: "Split Image Into List of Tiles" for the input, and "Merge List of Tiles Into Image" for the output after the upscaler.
Now of COURSE, this doesn't seem to work with the "Batch Manager" node. I have no idea why, but if I remember right it was crashing with no great error message. I was sorry to see the "Batch Manager" go because this was giving me that PNG output I could see right away to prove the output would be good.
At this point, I'm well into not really digging Comfy over just doing this in code. I'd already wasted enough time at this point trying to slam together nodes that should work together but don't.
But it's OK - because I had a workable graph with tiling. Or rather I thought I did because I thought I could just create a queue of 5-second video chunks. Not with any nodes I could find in comfy it turned out!
This is when I threw in the towel, exported my graph to JSON, and shoved it in Google Gemini's face to have it write me a Python script to do the same thing. THAT actually worked.
The 90's called, They Want Their Skateboard Videos Back #
So here's where I explain the 4k(ish) part. I had a box full of old MiniDV tapes that had been sitting around for 20+ years. Finally, I found a friend with a MiniDV camera (after buying 2 broken ones on eBay).
MiniDV were these tiny little tapes, like 4x smaller than VHS. But also super popular for skateboarders, because the cameras were getting smaller and you could really take them anywhere.
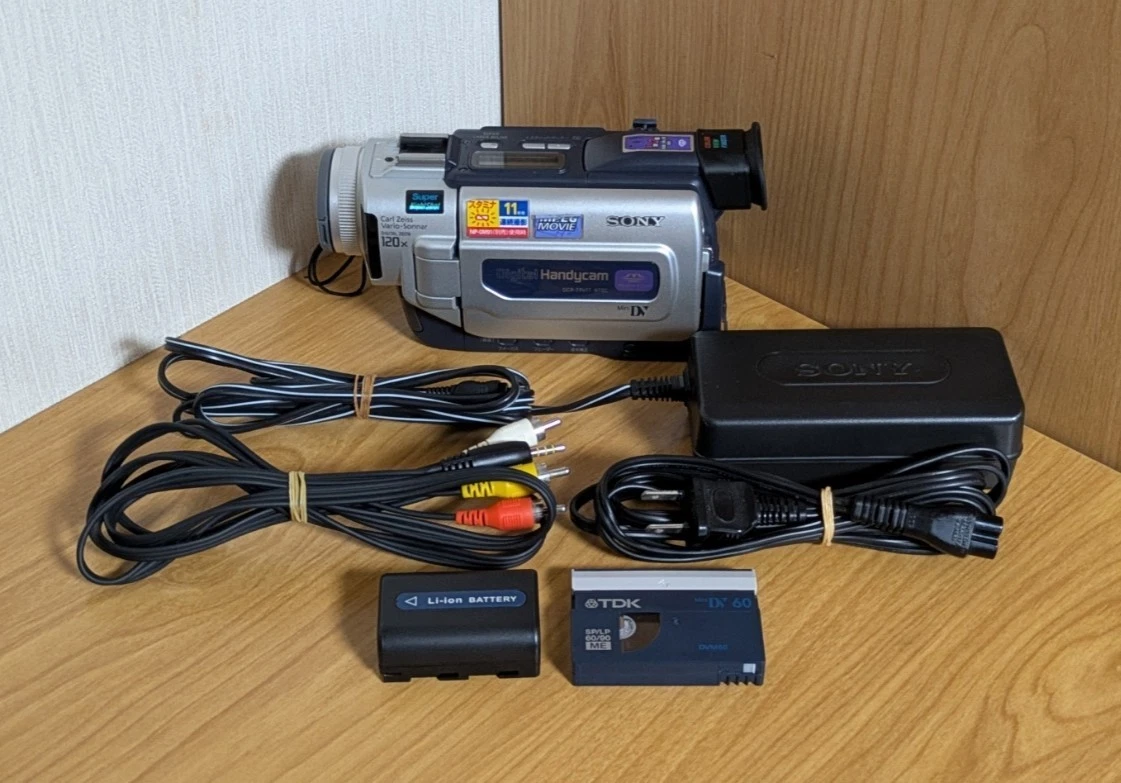
MiniDV resolution is 720x480 - and with 4x upscaling, 720x4= 2880, and 480x4=1920. So, not quite 4k, which is 3840x2160.
Now being a Python workflow, it was easy to just have the script suck in an entire video file and chop it up into 5 second chunks before sending to the upscaler.
However, when I saw the output, there was some...for lack of a better word...90's fuzz on it. My footage was a bit blurry at times, but the movement really brought out some weird artifacting probably caused by the motion blur not keeping up with the video interlacing. That, and other similar issues. These artifacts were just upscaled and the result didn't really feel like a good result. I asked Google Gemini to suggest some pre-processing steps to clean this up, and...well I guess it wrote the code, so I'll let it tell you all about the FFMPEG based pre-processing:
1. Interlace Analysis & Auto-Deinterlacing (idet / bwdif) #
- Operation: Scans frame headers and tests video content using FFmpeg's
idet(interlace detection) filter. If interlacing is flagged or detected, it appliesbwdif(Bob Weaver Deinterlacing Filter). - Purpose: Converts fields to progressive frames at native resolution before any scaling occurs. Deinterlacing after scaling or downscaling permanently bakes comb lines into the image.
2. Hardware-Compatible Macroblock Deblocking (deblock) #
- Operation: Applies FFmpeg's native
deblock=filter=weak:block=8filter to target the 8x8 grid boundaries typical of DV and early digital compression formats. - Purpose: Removes hard compression block edges so the AI model doesn't treat block boundaries as legitimate high-frequency structural lines and hyper-sharpen them into plastic grids.
3. Spatial/Temporal Denoising (hqdn3d) #
- Operation: Applies mild spatial and temporal noise reduction (
hqdn3d=1.5:1.5:3:3). - Purpose: Strips away high-frequency camera sensor noise and digital static while preserving underlying skin texture and subject edges. Without this, the AI upscaler mistakes micro-noise for fine detail and amplifies it into unnatural textures.
4. Chroma Realignment (chromashift) #
- Operation: Adjusts the horizontal color offset using
chromashift=cbh=-1:crh=-1. - Purpose: Corrects "color bleeding" (chroma shift) common in sub-sampled color formats (like NTSC 4:1:1 or PAL 4:2:0 DV captures), realigning color bounds cleanly to the luminance (luma) edges.
5. Square Pixel Ratio Normalization (setsar=1) #
- Operation: Sets the Sample Aspect Ratio (SAR) to 1:1 at native resolution (
setsar=1). - Purpose: Normalizes non-square pixel formats (such as standard-definition anamorphic or rectangular 720x480 DV) into true square pixels without forcing an early high-resolution upscale.
6. High-Bitrate Uncompressed Master Output (ProRes 422 HQ) #
- Operation: Exports the cleaned pass to a
.movcontainer using theprores_kscodec (-profile:v 3) alongside uncompressed PCM audio (pcm_s16le). - Purpose: Provides a clean, visually lossless intermediate file for the secondary AI upscaling pass in
main.pywithout introducing new generation loss or compression artifacts.
Once I added these....we'll hot damn: I was running this on footage of my old band and I was wearing this subtle stripey suit while playing keys. It was blurry before, but now, I could make out the stripes. It seemed to really work well.
Mercury Charm Offensive (my band) Remastered #
I started writing this blog post while only having done a couple of videos, but I've gone through a handful now. One of the other things I found once I had the video side working was that the audio was blown out because it was just recorded with a handheld MiniDV camera mic at a loud show. I experimented with a few different ways to process the audio. I had Gemini create a Python script that would separate the audio into stems, and then do some softening on the harsh audio clipping of each stem.
It worked pretty well, so then I got greedy and tried to do some generative audio and see if I could recover the vocals and make them clean. Ultimately, the singer sounded high pitched and squeaky - not like himself at all. Turns out terrible audio is just terrible audio. There's only so much you can do!
Anyway here's a playlist that I'll be adding onto for a few days after I publish this post. I'll note that all of this not only take time to process, but my macbook (and power supply) does get hot, and even when plugged in, the power will drop!
I don't think shaky MiniDV footage lightly processed made it magically good, but its really interesting to see parts get more detailed while other things like de-interlacing artifacts when the camera moves around a lot seem almost amplified.
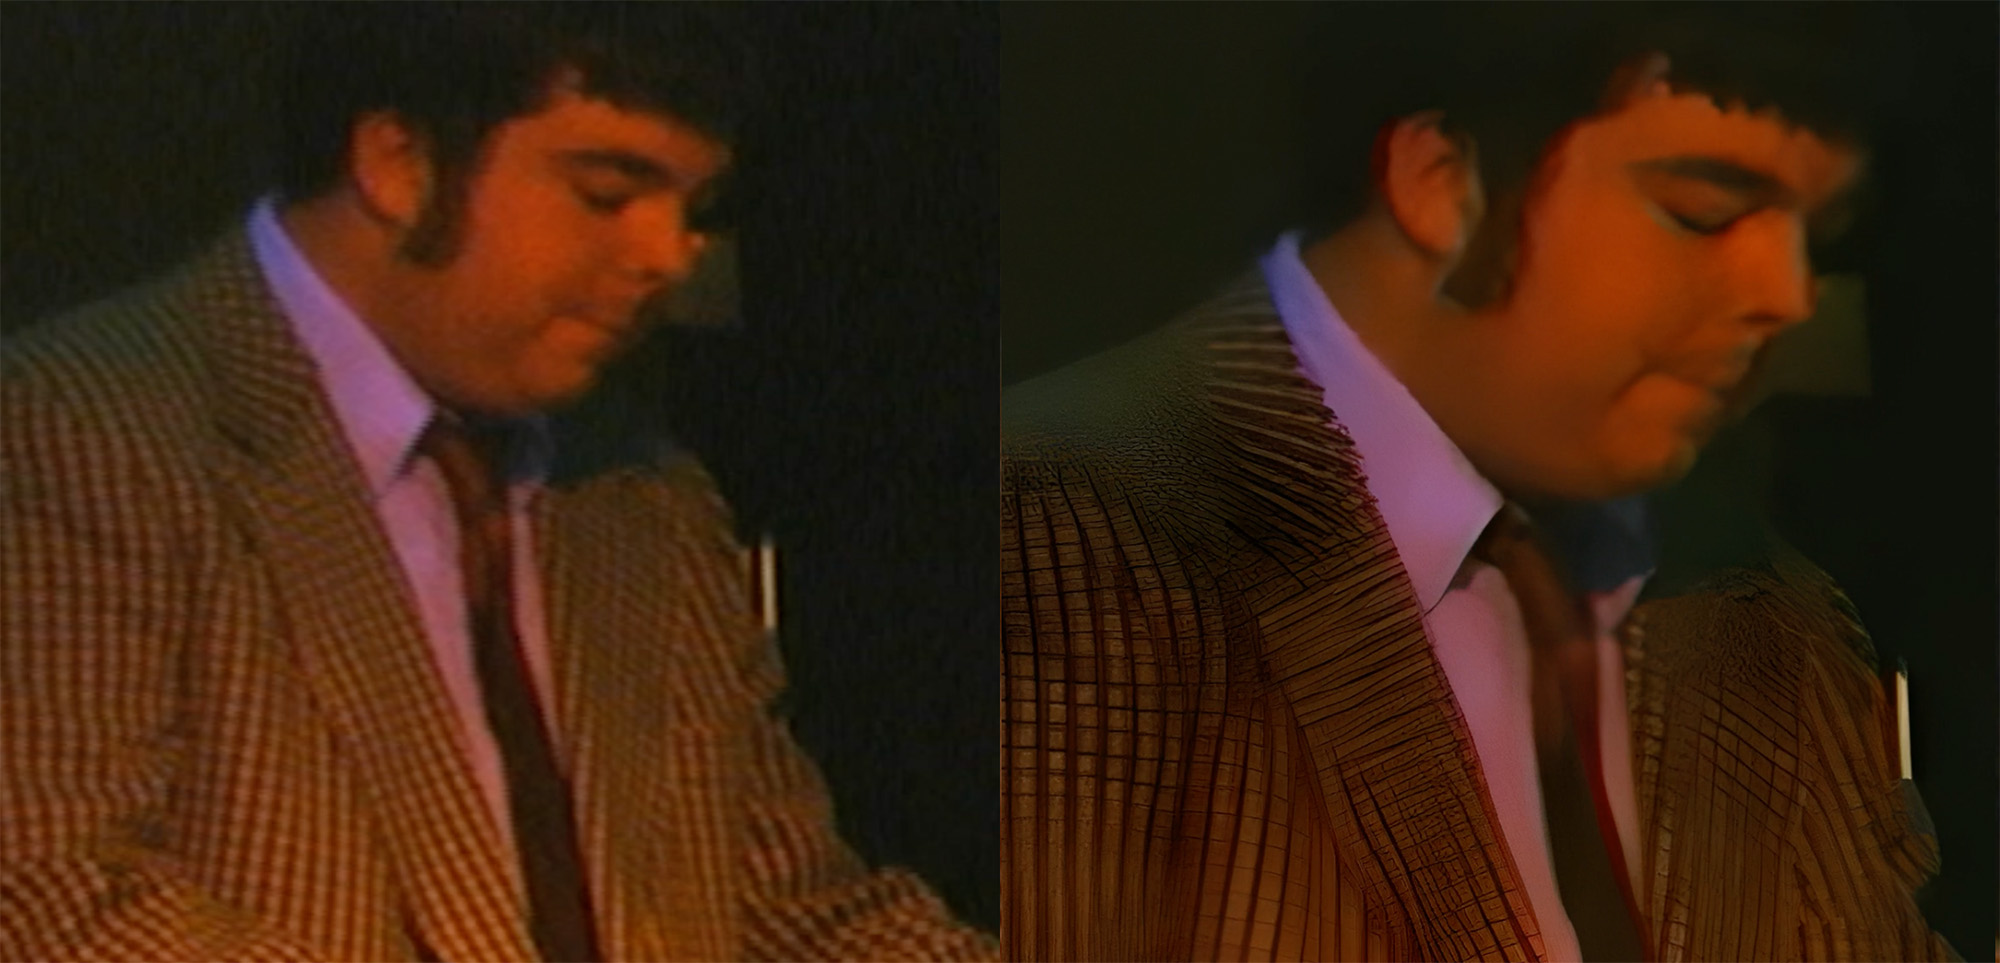 My stripe suit has some interesting (almost shiny detail) that pops out when zoomed in. Overall you
can see lots of blurry details have been smoothed out
My stripe suit has some interesting (almost shiny detail) that pops out when zoomed in. Overall you
can see lots of blurry details have been smoothed out
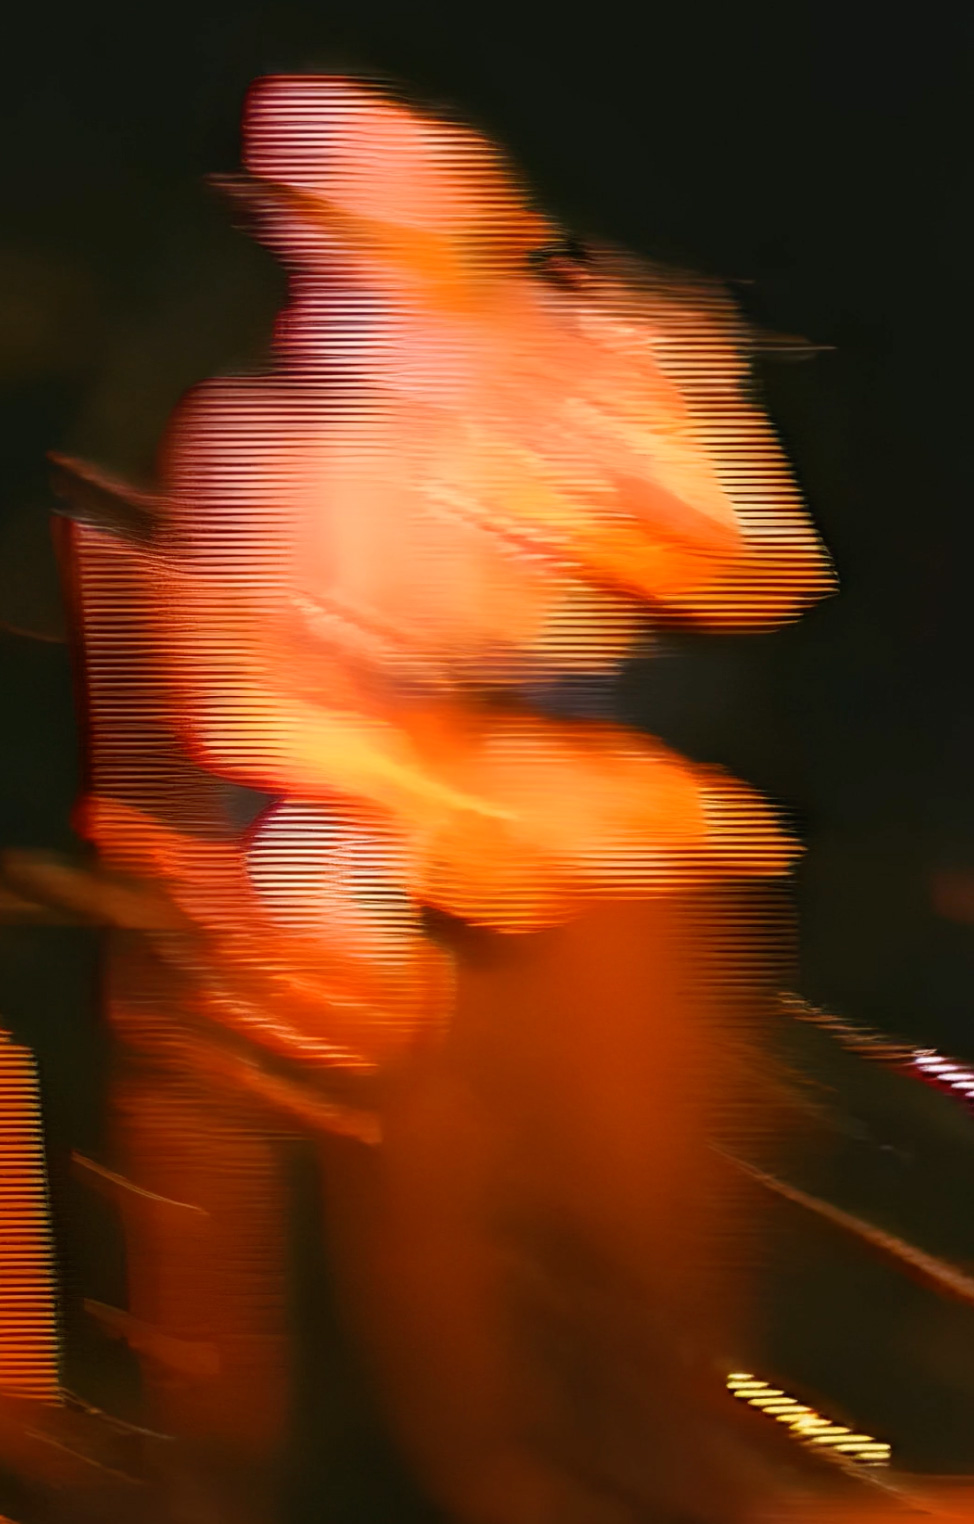 Even with upscaling, interlacing artifacts especially when moving the camera quickly are still there. But it's interesting to
see the added detail as we upscale these types of artifacts
Even with upscaling, interlacing artifacts especially when moving the camera quickly are still there. But it's interesting to
see the added detail as we upscale these types of artifacts
When all is said and done, most of the code was written by Google Gemini, but I popped the experiment in a Git repo here
As a final note, right as I was digitizing this footage from my 2005 era Boston rock band, I found out our drummer, Steve, passed away from a brain hemorrhage. Really put a damper on revisiting this footage. Felt a bit tacky, even. But now that it's been a month or so, I remember him fondly as having an amazing sense of humor and being an all around super nice guy who loved bad jokes. So, I think a subtle upscale while referring to this whole effort as bringing him back Tupac Hologram style is a good way to remember him. I think he'd like that.
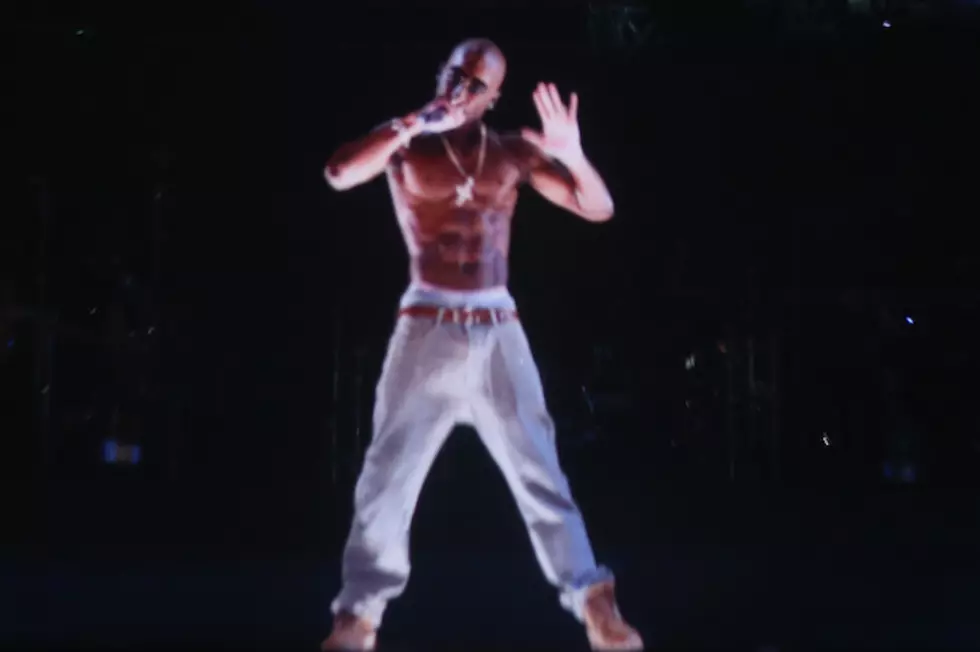 Using AI to upscale a video that happens to contain a really awesome person who passed away in the background sure feels like this
Here's the upscaled video for Retail by my band Mercury Charm Offensive
And the original video for comparison: